How to Install a Rear Spoiler
By George Nenadovich
I installed an original 1970 GSX rear spoiler on my 70 GS. I always
wanted a GSX but could not find a 1970 model in my price range so I built
one to my specifications.
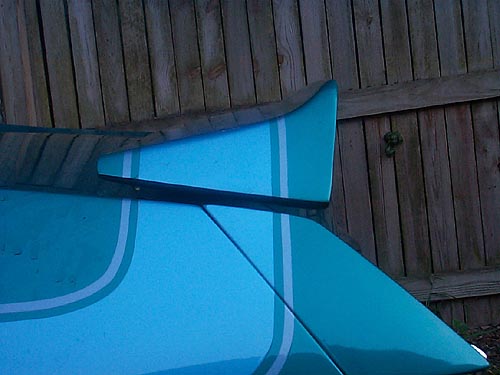 Here is a side view of the spoiler. The stripes are not as
original since the outer stripe is 1/4" wide and is 1/4" away
from the main stripe. Original GSX stripes had 1/8" space then a 1/8"
pin stripe. In my opinion, the 1/8" stripe was too small when viewed
from a distance.
Here is a side view of the spoiler. The stripes are not as
original since the outer stripe is 1/4" wide and is 1/4" away
from the main stripe. Original GSX stripes had 1/8" space then a 1/8"
pin stripe. In my opinion, the 1/8" stripe was too small when viewed
from a distance.
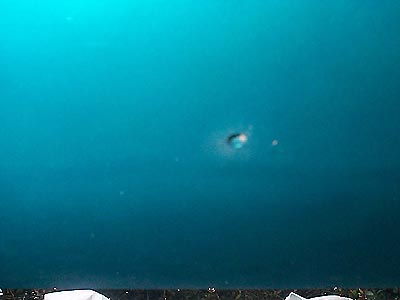 This is a factory original 1970 GSX spoiler with the vent
hole located on the bottom side just to the left of center. Hole diameter
is 3/16". New reproductions do not have this vent hole or the hole
is a different diameter.
This is a factory original 1970 GSX spoiler with the vent
hole located on the bottom side just to the left of center. Hole diameter
is 3/16". New reproductions do not have this vent hole or the hole
is a different diameter.
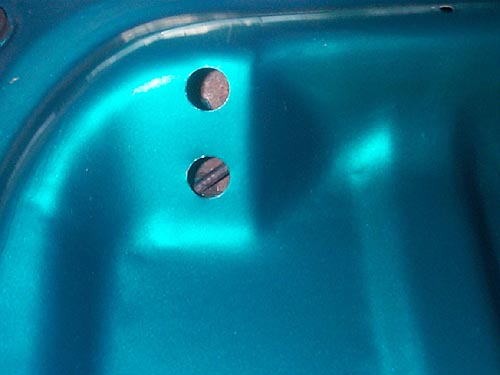 This shows the two access holes to tighten the lag screws
that hold the rear wing to the trunk lid. Under the head of each lag screw
is a large washer to distribute the load of the spoiler to the surrounding
metal with causing any distorion. Some aftermarket spoilers have studs protuding
from the pedestal.
Use the crown of the pedestal section as a center line to
measure the distance from the center of each hole/stud to the crown. Then
use the measurement for each stud/hole and transfer these to the trunk lid.
Drill a small pilot hole 1/8" for each stud/lag screw. Test fit the
spoiler BEFORE enlarging the holes to the correct size. On the bottom side
of the trunk lid, spoiler holes are prelocated in the bottom support structure
by two dimples. Drill a small pilot hole of 1/8" diameter. Next, use
a door hole saw to enlarge the hole to the 7/8" diameter. The 7/8"
hole will allow you to use a 3/8" drive socket to tighten the lag screws
or nuts which have a 7/16" or 1/2" hex head. (Dave Knutsen states:
original holes in the underside of the decklid are 1 1/2" for the
This shows the two access holes to tighten the lag screws
that hold the rear wing to the trunk lid. Under the head of each lag screw
is a large washer to distribute the load of the spoiler to the surrounding
metal with causing any distorion. Some aftermarket spoilers have studs protuding
from the pedestal.
Use the crown of the pedestal section as a center line to
measure the distance from the center of each hole/stud to the crown. Then
use the measurement for each stud/hole and transfer these to the trunk lid.
Drill a small pilot hole 1/8" for each stud/lag screw. Test fit the
spoiler BEFORE enlarging the holes to the correct size. On the bottom side
of the trunk lid, spoiler holes are prelocated in the bottom support structure
by two dimples. Drill a small pilot hole of 1/8" diameter. Next, use
a door hole saw to enlarge the hole to the 7/8" diameter. The 7/8"
hole will allow you to use a 3/8" drive socket to tighten the lag screws
or nuts which have a 7/16" or 1/2" hex head. (Dave Knutsen states:
original holes in the underside of the decklid are 1 1/2" for the
GSX cars. Should have one stud and one lag screw and have the stamped steel
reinforcements. That's what was originally installed, but two studs or two
lag screws and washers would work. The reinforcement just spreads the load
out over a little larger area than a washer would.)
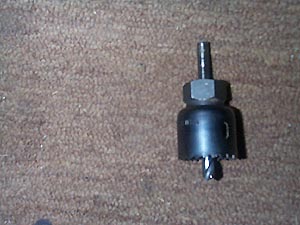 This is a 7/8" door hole saw available from Home Depot
or similar hardware stores. The "KEY" technique when using this
tool on the metal deck lid is to go very slow and use plenty of lubricant
(WD40, PB Blaster, Motor Oil) to keep the blade cool as it cuts the metal.
Remember this tool was designed to cut through wood and not metal so slow
and steady speed is important!
This is a 7/8" door hole saw available from Home Depot
or similar hardware stores. The "KEY" technique when using this
tool on the metal deck lid is to go very slow and use plenty of lubricant
(WD40, PB Blaster, Motor Oil) to keep the blade cool as it cuts the metal.
Remember this tool was designed to cut through wood and not metal so slow
and steady speed is important!
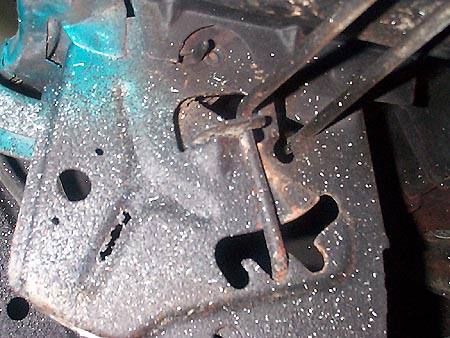 Here is a picture showing the torsion bars that hold the
trunk lid open. There are three slots to adjust torsion. With the bar set
in the middle slot for my car, this keeps the trunk lid open but really
needs to go to the next slot for more torsion (torque) to keep the trunk
lid open. On my car, if you just bump/touch the lid it will shut. With aftermarket
spoilers, those are supposed to be lighter, approximately 10 lbs. The original
spoilers weigh approximately 16 lbs. In order to move the torsion bar to
the next slot requires some effort. Use a LARGE screw driver or pry bar
to lift the bar up and over to the next slot. You can also use a very LARGE
pair of Channel Lock pliers to do the adjustment. DO NOT put your hands
near or use your fingers to move the bar over when you raise it up from
the slot, the torsion bars have great "spring" forces and can
act wildly if the tool loses its hold on the bar. Usually it takes one person
to lift the bar up and another to move it to the next slot. It may take
several tries. This adjustment must done on both sides of the trunk lid.
Here is a picture showing the torsion bars that hold the
trunk lid open. There are three slots to adjust torsion. With the bar set
in the middle slot for my car, this keeps the trunk lid open but really
needs to go to the next slot for more torsion (torque) to keep the trunk
lid open. On my car, if you just bump/touch the lid it will shut. With aftermarket
spoilers, those are supposed to be lighter, approximately 10 lbs. The original
spoilers weigh approximately 16 lbs. In order to move the torsion bar to
the next slot requires some effort. Use a LARGE screw driver or pry bar
to lift the bar up and over to the next slot. You can also use a very LARGE
pair of Channel Lock pliers to do the adjustment. DO NOT put your hands
near or use your fingers to move the bar over when you raise it up from
the slot, the torsion bars have great "spring" forces and can
act wildly if the tool loses its hold on the bar. Usually it takes one person
to lift the bar up and another to move it to the next slot. It may take
several tries. This adjustment must done on both sides of the trunk lid.
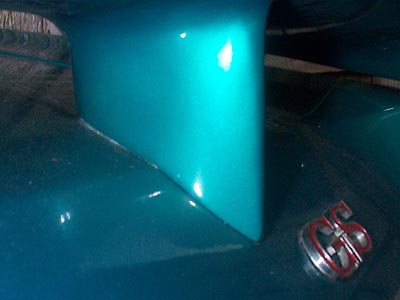 This shows how the contour of the pedestal matches the outline
of the trunk lid. The center of the pedestal is the reference point to take
measurements of the holes needed to be drilled in the trunk lid as stated
above. Notice there is no gap between the pedestal and trunk lid surface.
With some aftermarket spoilers, you may need to sand the pedestal base to
match the contour.
This shows how the contour of the pedestal matches the outline
of the trunk lid. The center of the pedestal is the reference point to take
measurements of the holes needed to be drilled in the trunk lid as stated
above. Notice there is no gap between the pedestal and trunk lid surface.
With some aftermarket spoilers, you may need to sand the pedestal base to
match the contour.