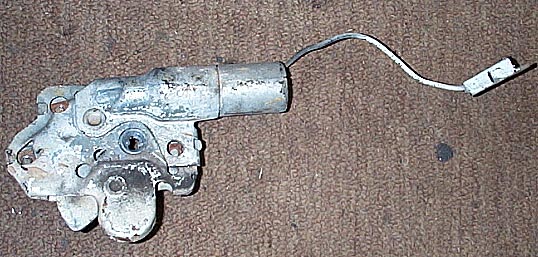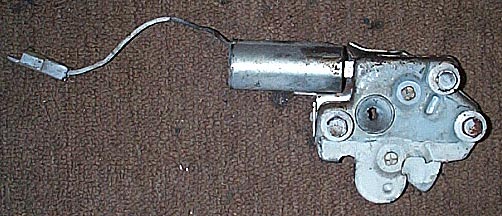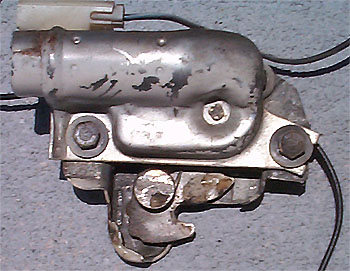
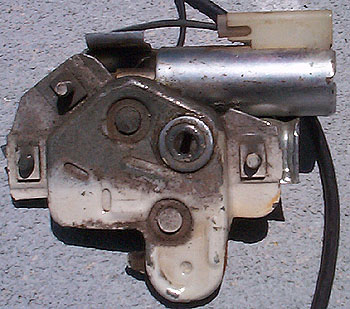
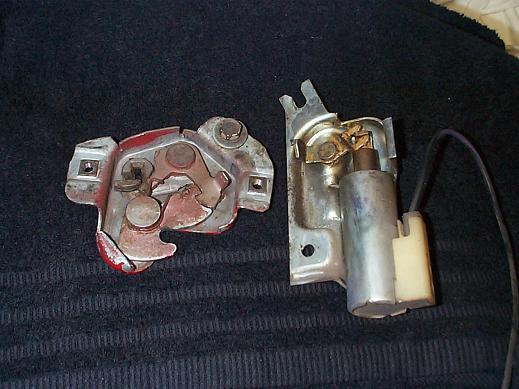
While I was cruising through the junkyard (1990's new term:recycling yard) on my usual once-a-week parts hunt, I spotted a 1970 Electra and decided to check it out. I was looking to pick up an extra fan shroud if the car had a 455 since they use the same shroud as the Skylark /GS455. It turned out to be a 350 car but had quite a few options including power trunk release. The trunk latch looked to be the same as a Skylark so I went over to a Skylark and removed the trunk latch to compare the two. The power latch had the same features except the back portion was open to allow the solenoid to operate the latch. I thought this would be a neat addition to my two Gran Sports and my Oldsmobile Cutlass. I took the latch, solenoid, switch in the glove box and about six feet of the black wire that runs from the solenoid to the back seat. The wire length would let me make a connection (splice) under the rear seat and everything would look original. This option can be considered a non-original factory option! I have never seen a power trunk in any Skylark or GS. Here are a couple pictures for the power trunk set-up found in full size cars such as Electra, Olds 98, Bonneville.
Installing the latch would took a little longer than I had thought. The bolts will not exactly line up with the factory slotted holes in my trunk lid so I had to do some minor alterations. The bolt hole on the passenger side of the trunk lid is correct and needed no modifications. I determined the passenger side was correct because I bolted the driver's side in first and the latch did not line up with the trunk catch. So, the two holes on the driver's side had to be elongated 3/8" towards the driver's side. Since the slotted holes are in two layers of metal spot welded together, using a rat-tail file would take a long time to elongate the holes the desired length. I used a 1/4" pointed carbide cutter in a drill to remove the necessary metal which only took about ten minutes.
After I inserted and lightly tightened all three bolts, I noticed a hole needed to be drilled into the sheet metal in order for the solenoid to activate the latch. With the latch in the correct position, I marked the center of the hole which is directly over the latch release arm for the solenoid to actuate the latch. I removed the latch and I used a 3/4" door hole saw to cut the hole. Door hole saws are available at any home improvement center and are fairly cheap, $5. Door hole saws are not meant to cut metal so go slow and the tool will go through in a few minutes. If you go too fast, the tool will burn and be ready for the garbage bin.
I then mounted the solenoid and latch together and gave the system a test run to make sure the solenoid did not bind and the trunk opened. I operated the solenoid from inside the trunk and used another battery for a power source. Everything worked great so now on to running the wire up to the dash and mounting the switch.
I spliced in six feet of 16-18 gauge wire under the rear seat and ran the wire up to the dash. Make sure you solder the wires together and then use heat shrink tubing to prevent any shorts. Shrink tubing is available from Radio Shack in an assortment pack for about $5.
I decided not to put the switch in the glove box since it was out of place although the Electra had the switch in the glove box. I put the switch under the dash and just to the left of the parking brake release handle. There is a small recessed area next to the handle and the switch will fit there and can not be seen when looking at the dash. The switch I removed from the Electra is a two piece design, a cone screws onto the switch body which is inserted through a hole. On later model Buicks, 1973 and up, the switch is a yellow push button attached to a L-shaped metal bracket. The area I chose has two pieces of sheet metal 1/4" apart and there is not enough threads on the switch body to reach through from behind. So, I had to cut a clearance hole through the first piece of sheet metal so the cone could be screwed on. Once again I used a 1.25" door hole saw to drill the clearance hole. I then drilled a 1/2" hole through the second metal layer and inserted the switch through the hole and screwed the cone on the switch. You can choose any location you want. I chose the one described because I did not want to keep opening the glove box each time to open the trunk. Double work!
When I removed the switch from the Electra I took about 10" of each wire that goes to the switch. There is one black wire which goes to the solenoid and one pink wire which goes to the power source. I connected the black wire to the solenoid wire. The pink wire can go in either the "ign" or "bat" socket in the fuse panel. If the trunk release is to operate regardless of ignition switch position, connect the pink wire to the "bat" socket which constantly has 12 volts. I connected my wire to the "bat" terminal in case the keys get locked in the trunk. If you connect the pink wire to the "ign" socket the ignition switch will have to be in the on position in order to operate the release.
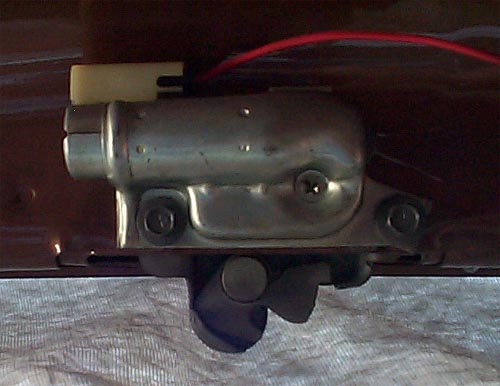
Many full size cars have power trunk release set-ups such as Electras/LeSabres, Olds 98s, Pontiac Catalina/Bonnevilles etc. Most local recycling yards charge about $10 for the set-up which is relatively cheap for a power feature. The total installation time is about an hour. Below is a pic of the completed installation.
Here are pics of the 69-70 power trunk units. They are one piece and require no trunk lid modifications since they bolt inside the deck lid. Since these were only available for 2 years, they are rare.