A common problem with 1968-72 Skylarks is the doors wear at the hinge pins causing the rear of the door to drop/sag and not line up with the rear quarter panel. The easiest way to test for this condition is to open the driver's door, usually has the most wear, and and try to lift the door up by the handle. You should not feel any play in the door. If you do, the amount of play indicates wear between the hinge pins and the hinge holes. In the pics you can see this hinge has excessive corrosion and wear. This hinge should be discarded since it is not rebuildable.
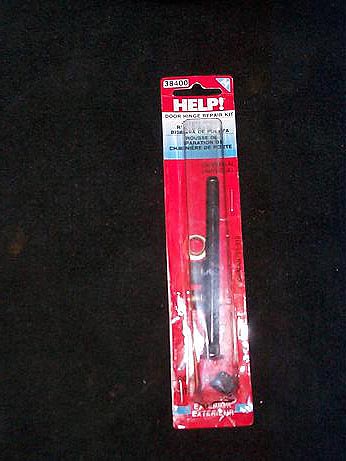
In order to solve this problem, several aftermarket Buick parts vendors carry the hinge repair kits. The kit contains 4 new hinge pins and eight bronze bushings. The kit is simple to install but requires some time and a little patience. Kits run about $20. You can also go to most auto parts stores and buy the kit for about $5 each. It is HELP # 38400
The doors will have to be removed from the car so a little care is necessary to remove the doors. I use thick towels placed in the fender-door gap to prevent the door from damaging the paint as the door is removed. There are six bolts per hinge and only one side or three bolts need to be removed per hinge. These are 1/2" hex head and are fairly easy to remove. Sometimes it is a good idea to use a floor jack to hold up door while you remove the 6 bolts. If you have an assistant, they can balance the door on the jack instead of holding it.
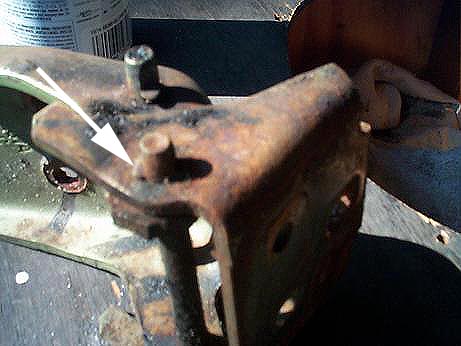
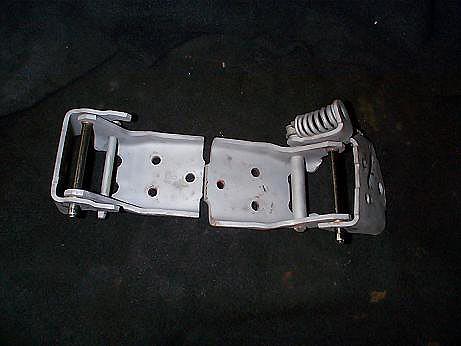
With the door removed, remove the remaining bolts holding the hinge in place. Both hinges, upper and lower, are held together by the hinge pin which is cleaved in position at the factory. To remove the hinge pins, use a file or die grinder to grind away the cleaved portion(white arrow) from the pins. The upper door hinges will come apart once the pins are pulled out. You will now be able to see the worn portions on the pins as well as the wear in the hinge holes. The holes will no longer be a circle and may be elliptical(oval.)
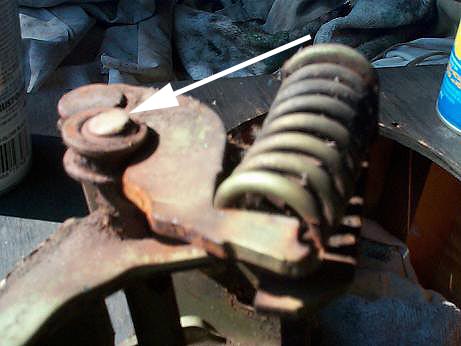
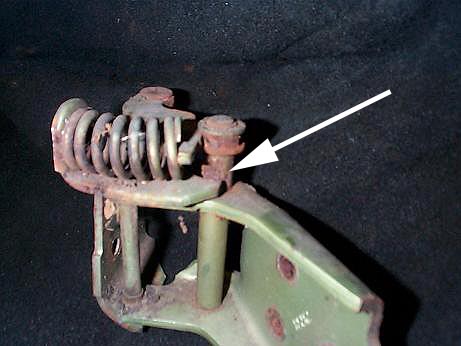
The lower hinges have a compression spring as seen in pic above that creates pressure on the hinge which holds the door open. Make sure you do a careful inspection of the entire hinge before deciding to rebuild it. Notice arrow shows the upper roller has completely worn away which makes it sit at an awkward angle and prevents smooth hinge operation. In this case, this hinge should be discarded. Before removing the spring, place a towel over the spring and use a large screwdriver to pry the spring out of position. It will pop/fly into the towel. Without the towel, the spring will fly out with great force and can injure you or something else in the immediate area. With the spring removed, repeat the process to remove the hinge pin.
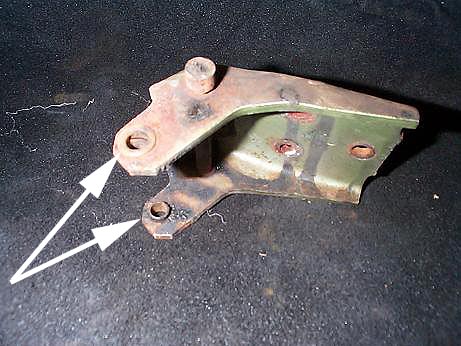
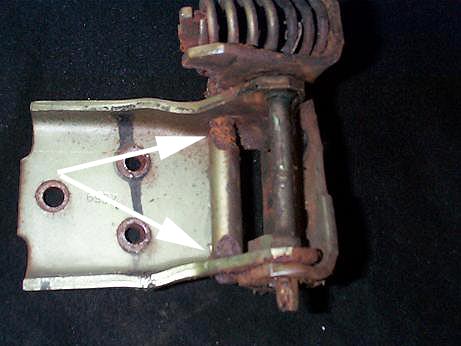
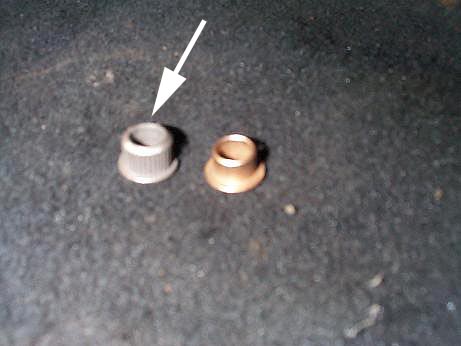
The arrows indicate the plastic bushings the factory used during assembly. These usually are worn out or dry rotted. These will be replaced with the smooth brass bushings included in the kit.
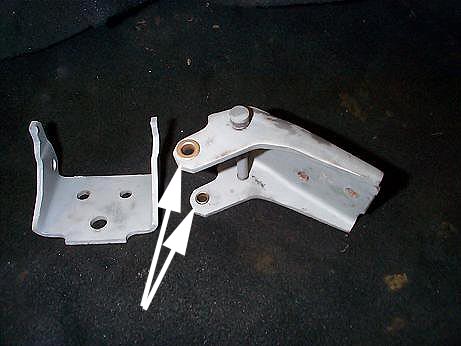
To install the rebuild kit, press/tap in the new bushings with a hammer (see white arrows). You will need to use a 23/64" drill to open the end of the where the original hinge pin was installed. If you look closely, you will see one of the holes has flutes in it which held the pin in place. By drilling the hole opening to 23/64" you will be able to tap the new pin in place. If you do not open the hole, you will never get the pin to sit flush with the hinge surface.

Reassembly goes fairly fast. For the lower hinges, once again use a towel over the spring before installing it. Place one end of the spring in position. I like to use a very large pair of slip-joint pliers or Channel-Locks to slightly compress the spring so I can just start one side of the spring coil in the position above the raised boss where the spring resides once installed. This makes it easier to install the spring. Now, cover the spring with towel and firmly tap the other end into place with a hammer. One hit should do it!
Reinstall the hinges on the door and and reinstall the doors on the car. You may have to readjust the catch on the rear door jamb since the door will be sitting higher and the latch may not engage the latch pin. Use a Torx tool on a 3/8" ratchet to loosen the latch pin and adjust the pin so the door will close easily and align with the rear quarter panel.
Time to redo each hinge with bead blasting included is about 15 minutes. Total time to do the job of all four hinges and realign doors can be from 2-3 hours.