How to Remove 1970-2 Instrument Clusters
by George Nenadovich
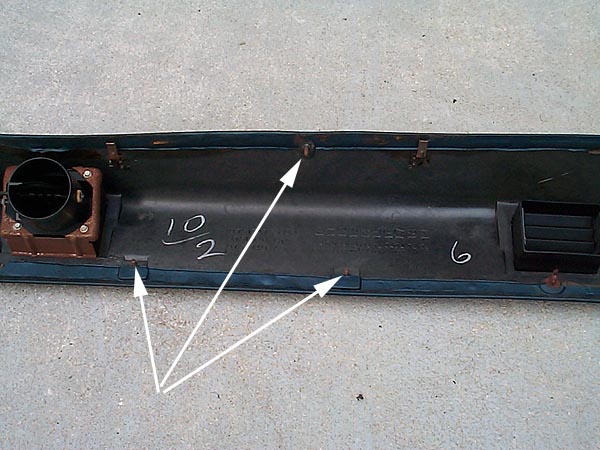 Arrows indicate the three studs that hold the dash pad to
the metal dash support frame. The top stud may or may not have a nut on
it. From my experience, this item seems to have been skipped during assembly.
Easiest way to access the nuts on these studs is to remove the radio and
radio bezel and slide you hand under the dash pad. One stud is located directly
above the glove box and the other one just to the right of the radio opening.
Nuts are usually a 11/32" hex head.
Arrows indicate the three studs that hold the dash pad to
the metal dash support frame. The top stud may or may not have a nut on
it. From my experience, this item seems to have been skipped during assembly.
Easiest way to access the nuts on these studs is to remove the radio and
radio bezel and slide you hand under the dash pad. One stud is located directly
above the glove box and the other one just to the right of the radio opening.
Nuts are usually a 11/32" hex head.
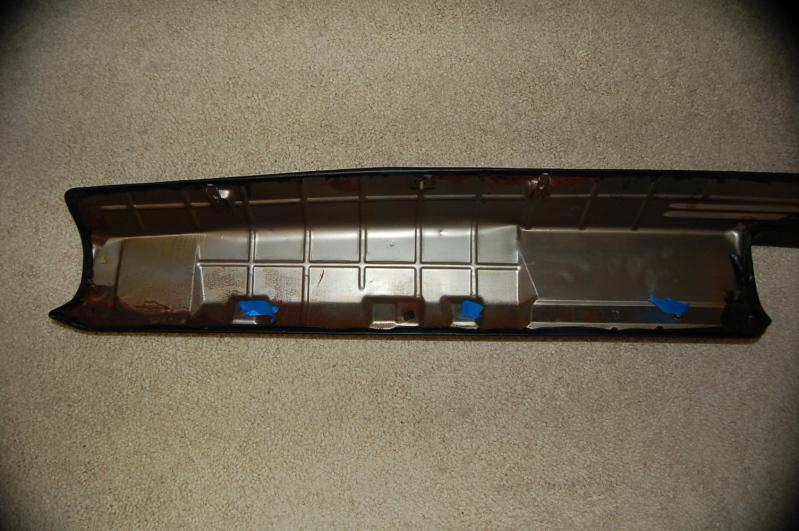 Here is a 68 dash pad....there are 4 studs with 3 along the
bottom edge.
Here is a 68 dash pad....there are 4 studs with 3 along the
bottom edge.
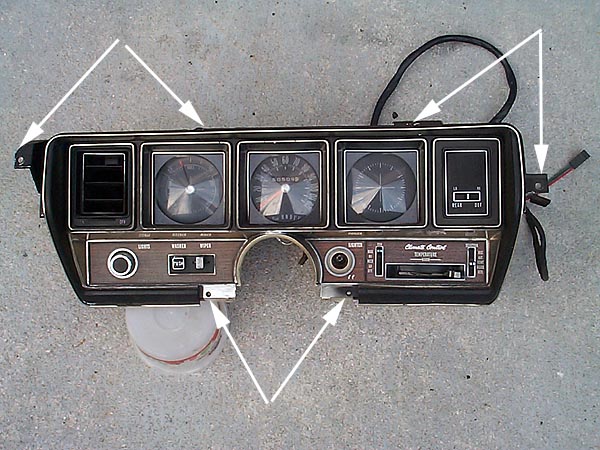
 Arrows indicate the retainers for the two upper instrument
cluster screws. Once these screws are removed. You can pull the dash pad
out. Will require a firm pull to "pop" the end pins.
Arrows indicate the retainers for the two upper instrument
cluster screws. Once these screws are removed. You can pull the dash pad
out. Will require a firm pull to "pop" the end pins.
 Once the pad is removed you will have access to the screws
holding the instrument cluster to the metal dash support. The top four arrows
indicate 1/4" hex head sheet metal screws with washers. The lower two
indicate small, black Phillips head screws. You will also need to remove
the lower vent tube below the steering column and the lower steering column
cover plate.
Once the pad is removed you will have access to the screws
holding the instrument cluster to the metal dash support. The top four arrows
indicate 1/4" hex head sheet metal screws with washers. The lower two
indicate small, black Phillips head screws. You will also need to remove
the lower vent tube below the steering column and the lower steering column
cover plate.
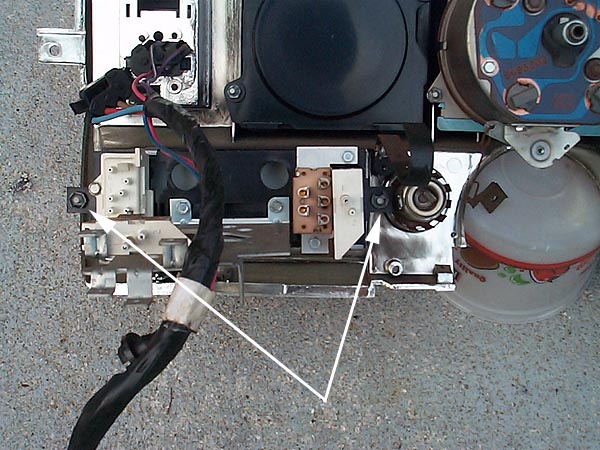
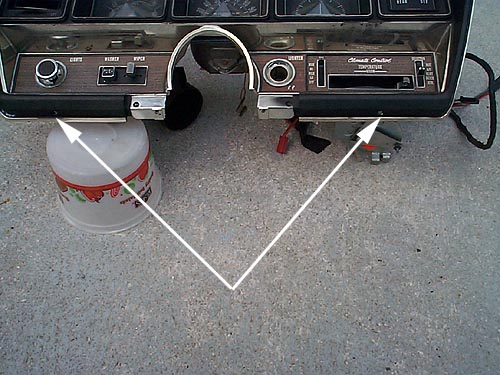 Arrows indicate two more black, Phillips head screws that
hold the cluster to the metal dash support.
Arrows indicate two more black, Phillips head screws that
hold the cluster to the metal dash support.
 This is the gear indicator clip which is attached to the
steering column collar with a 1/4" sheet metal screw. Remove the screw
and slide the clip from the column. Now remove two nuts, 9/16", from
the column support so you can slide the column down. I like to lay a towel
over the column so when I remove the cluster I do not accidentaly scratch
the column.
This is the gear indicator clip which is attached to the
steering column collar with a 1/4" sheet metal screw. Remove the screw
and slide the clip from the column. Now remove two nuts, 9/16", from
the column support so you can slide the column down. I like to lay a towel
over the column so when I remove the cluster I do not accidentaly scratch
the column.
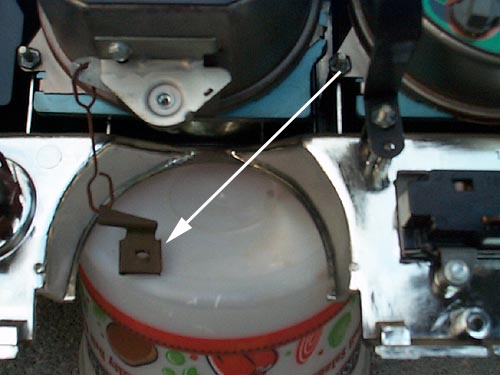
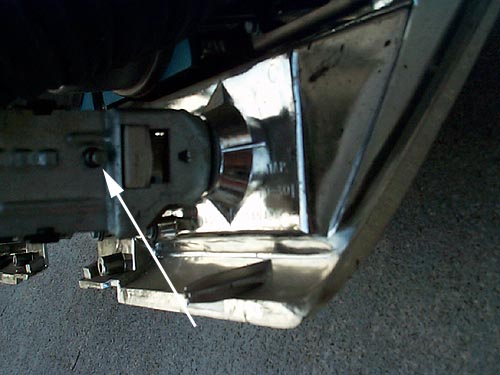
 With the column resting lower, you can slide your hand up
to depress this clip. This will allow the speedo cable to disconnect from
the speedometer. When this is released you will be able to pull the cluster
out approximately 4-5".
With the column resting lower, you can slide your hand up
to depress this clip. This will allow the speedo cable to disconnect from
the speedometer. When this is released you will be able to pull the cluster
out approximately 4-5".
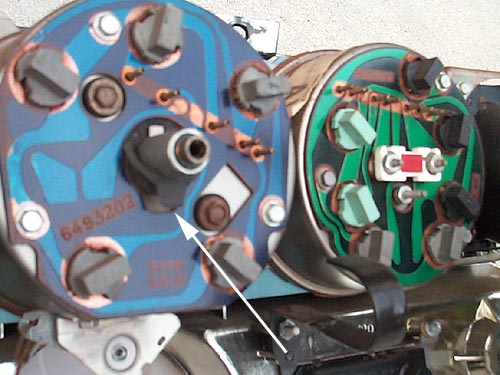
 The arrows point to two "J" hooks. These hold the
main wiring harness in place. Slide the wiring harness from the hooks and
the instrument cluster will come out a little farther.
The arrows point to two "J" hooks. These hold the
main wiring harness in place. Slide the wiring harness from the hooks and
the instrument cluster will come out a little farther.
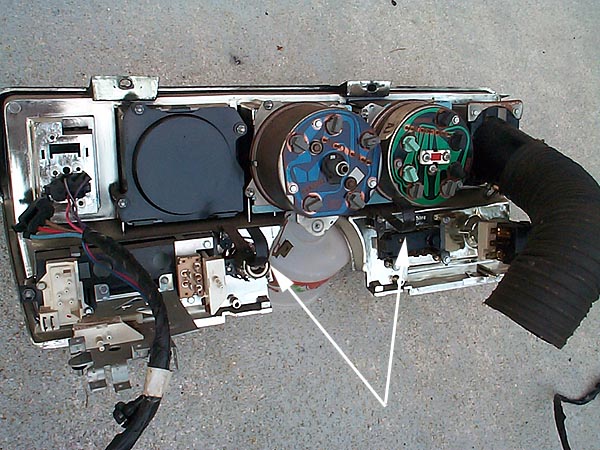
 Arrows indicate the two nuts holding the AC controller to
the cluster. Remove these two and leave the controller connected to the
vacuum hoses and wiring harness. No need to make more work than necessary.
Nuts are 11/32 or 3/8. Disconnect wiring from lighter, headlight switch,
gas gage and the unit will come out in one piece like this one.
Arrows indicate the two nuts holding the AC controller to
the cluster. Remove these two and leave the controller connected to the
vacuum hoses and wiring harness. No need to make more work than necessary.
Nuts are 11/32 or 3/8. Disconnect wiring from lighter, headlight switch,
gas gage and the unit will come out in one piece like this one.
 This is the release button to remove the headlight knob.
This is necessary to remove the bezel/escrutcheon below the knob to install
a new woodgrain dash kit.
This is the release button to remove the headlight knob.
This is necessary to remove the bezel/escrutcheon below the knob to install
a new woodgrain dash kit.