Steering Box Rebuild
by George Nenadovich
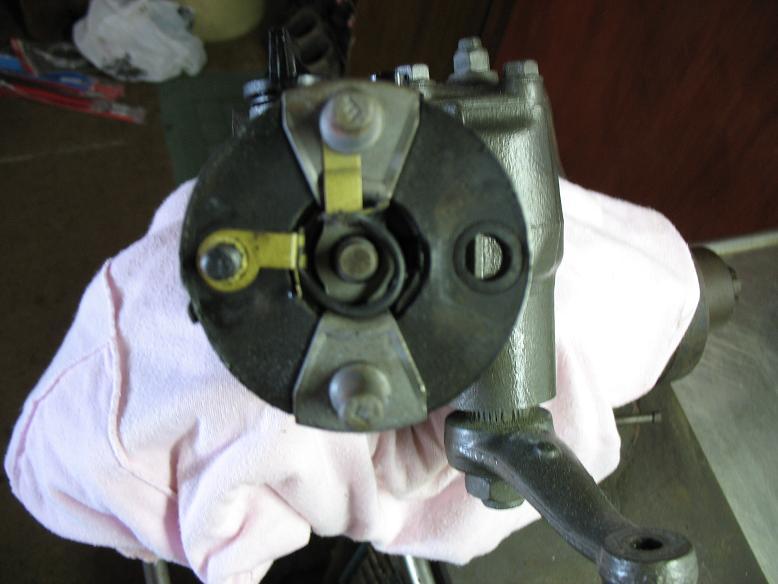 Here is a steering box removed from a 71 Skylark GS. Box
had a leak originating from behind the rag joint.
Here is a steering box removed from a 71 Skylark GS. Box
had a leak originating from behind the rag joint.
 Here is the box with the rag joint removed. Use a 7/16"
12 point socket to remove the retaining screw that holds the rag joint to
the steering box. If you look closely at the pic, you can still see some
power steering fluid at the 6 o'clock position. Notice input shaft has a
flat machined area....this mates to the rag joint inner diameter to maintain
correct orientation.
Here is the box with the rag joint removed. Use a 7/16"
12 point socket to remove the retaining screw that holds the rag joint to
the steering box. If you look closely at the pic, you can still see some
power steering fluid at the 6 o'clock position. Notice input shaft has a
flat machined area....this mates to the rag joint inner diameter to maintain
correct orientation.
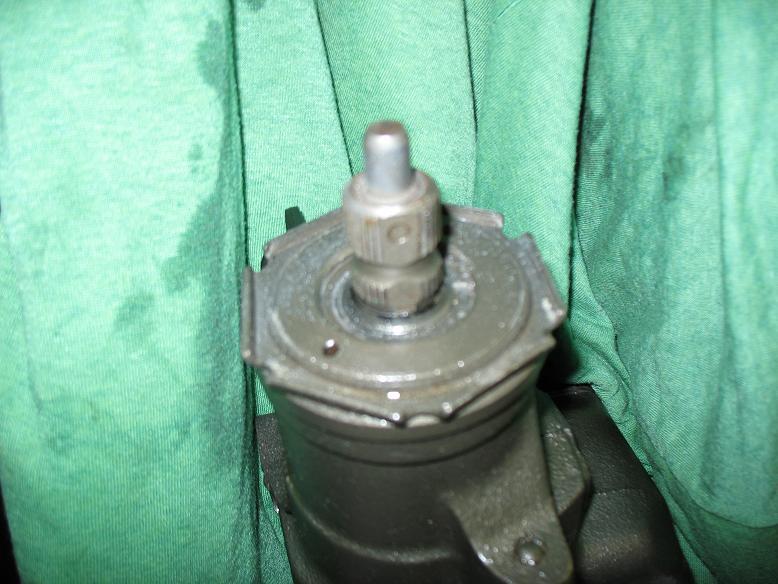
 Bottom left arrow show a bad dust seal and this is where
the ps fluid was leaking. Upper arrow shows snap ring that holds in the
dust seal.
Bottom left arrow show a bad dust seal and this is where
the ps fluid was leaking. Upper arrow shows snap ring that holds in the
dust seal.
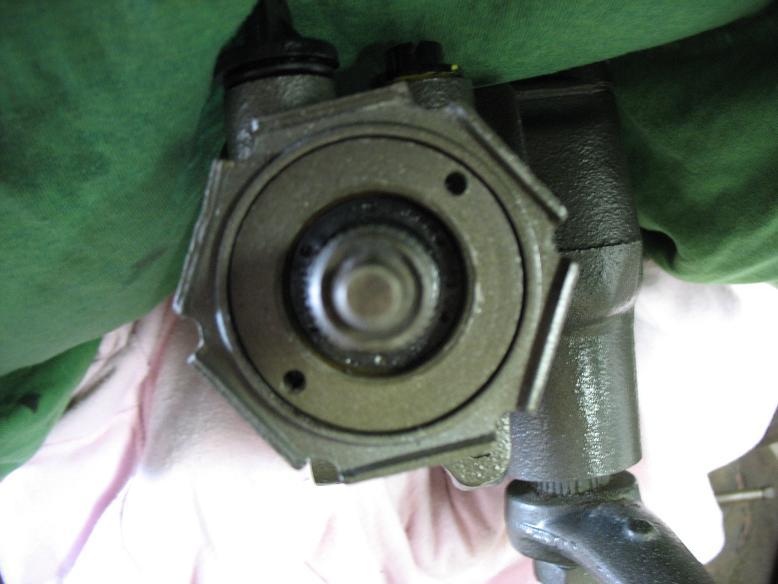 Remove the snap ring. Remove the dust seal using a scribe/awl
or small screwdriver. Dust seal is removed exposing the inner seal.
Remove the snap ring. Remove the dust seal using a scribe/awl
or small screwdriver. Dust seal is removed exposing the inner seal.
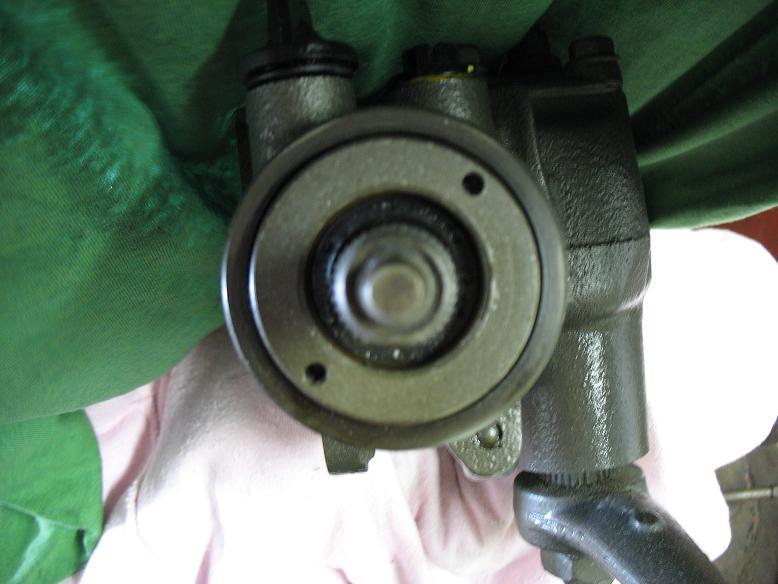 Use a hammer and a round chisel/drift to gently rotate/remove
the retaining ring/nut. Use a marker to make a note of the hole orientation.....two
shown here are at the 2 and 7 o'clock position. You want to reinstall the
jamb nut in the same position.
Use a hammer and a round chisel/drift to gently rotate/remove
the retaining ring/nut. Use a marker to make a note of the hole orientation.....two
shown here are at the 2 and 7 o'clock position. You want to reinstall the
jamb nut in the same position.
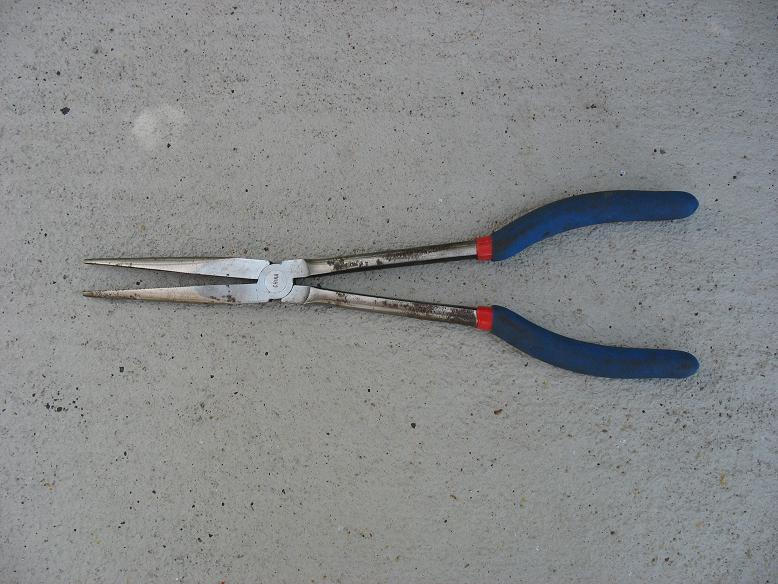 Use a large pair of needle nose pliers to remove the jamb
nut. Insert plier points in the holes mention above and unscrew the nut.
Use a large pair of needle nose pliers to remove the jamb
nut. Insert plier points in the holes mention above and unscrew the nut.
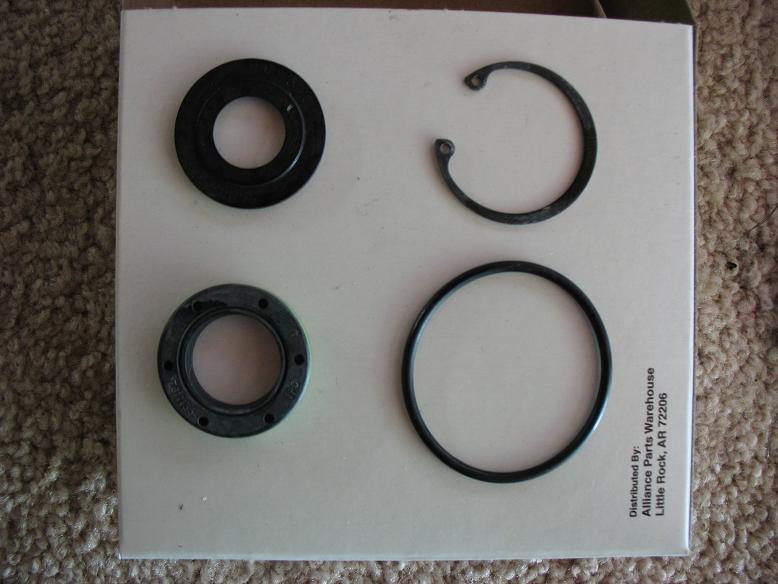 Here is the upper steering box seat kit. It usually runs
$10-12. PartsMaster 7095 kit. It includes an exploded view
of the steering box, upper dust seal, input shaft seal, snap
ring and o-ring.
Here is the upper steering box seat kit. It usually runs
$10-12. PartsMaster 7095 kit. It includes an exploded view
of the steering box, upper dust seal, input shaft seal, snap
ring and o-ring.
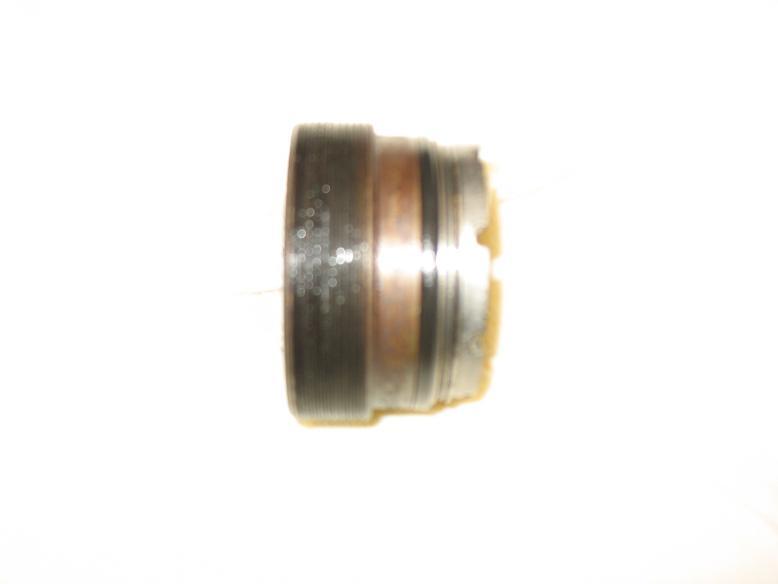 Here is the jamb nut with the old o-ring. Replace this o-ring
with a new one. Flip the nut upside down and remove the inner seal. Drive
out the seal with a screwdriver. Install the new seal using a 1/2"
drive socket marked 1" Gently tap the seal in place to seat it. Use
a lil oil on seal ID to prevent a dry seal contact with input shaft.
Here is the jamb nut with the old o-ring. Replace this o-ring
with a new one. Flip the nut upside down and remove the inner seal. Drive
out the seal with a screwdriver. Install the new seal using a 1/2"
drive socket marked 1" Gently tap the seal in place to seat it. Use
a lil oil on seal ID to prevent a dry seal contact with input shaft.
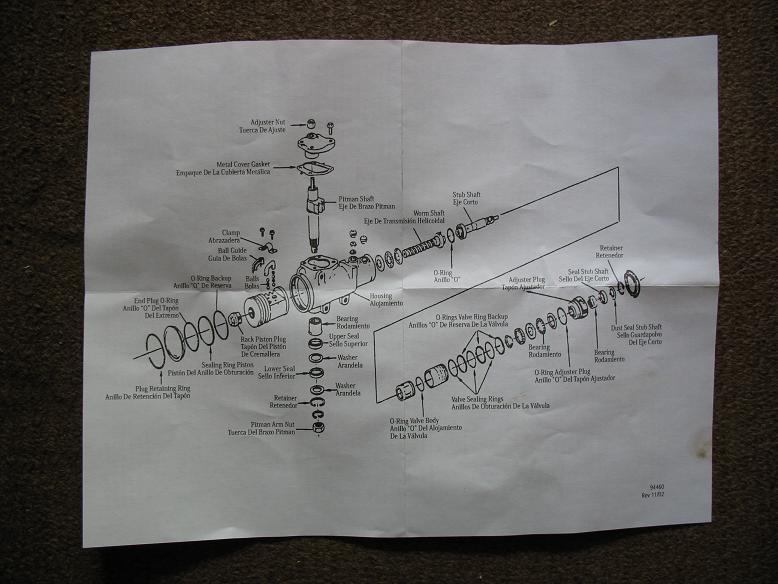 Here is the included sheet showing steering box exploded
view.
Here is the included sheet showing steering box exploded
view.