How To Install Sport Mirrors
by George Nenadovich
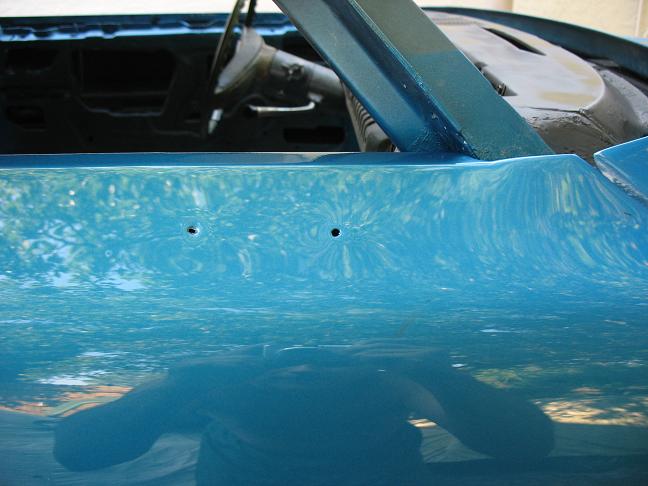 Here is the pass. side door with holes for the sport mirror.
The holes are a "mirror" image of the ones found on the driver's
door. Holes are approx 2" apart.
Here is the pass. side door with holes for the sport mirror.
The holes are a "mirror" image of the ones found on the driver's
door. Holes are approx 2" apart.
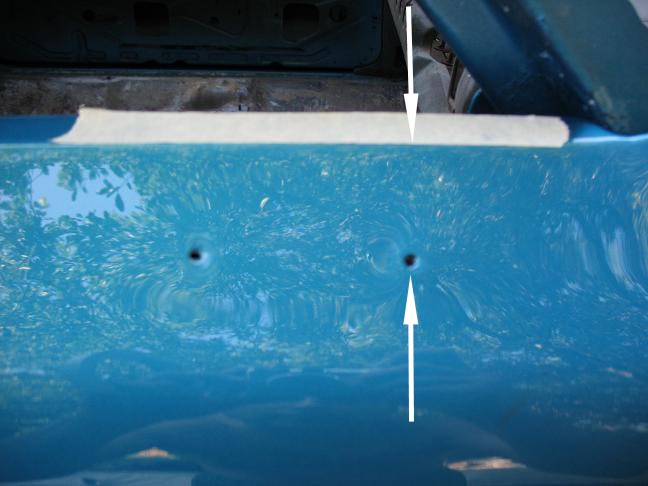 The distance between the arrows is about 1.5". The masking
tape is used here
to show the upper door fold/body line to use as a reference
line.
The distance between the arrows is about 1.5". The masking
tape is used here
to show the upper door fold/body line to use as a reference
line.
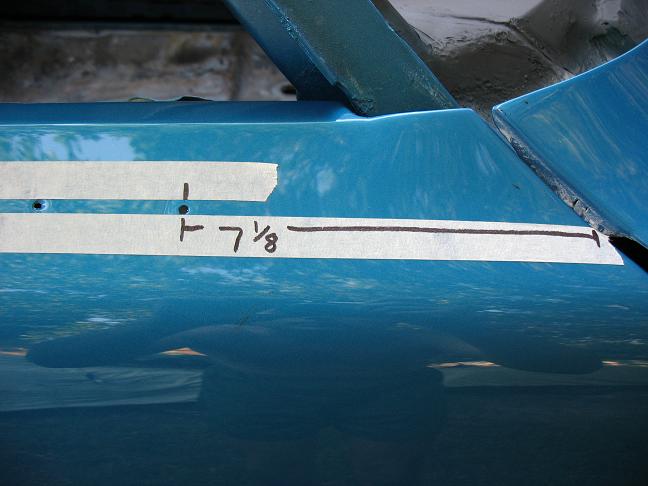 Here is a dimension of 7.125" as shown on the masking
tape. This was taken from the chrome mirror on the driver's side. I compared
this dimension to several other A-body cars I own and notice this dimension
only appears correct for early 70 models. The dimension for 71-2 models
is another inch towards the rear....8.125". You can measure
from the leading edge on the driver's door and do the same for the passenger
door. The dimension shown can range from 7 to 7.125" for 70 models
and 8 to 8.125" for 71-2 models.
Here is a dimension of 7.125" as shown on the masking
tape. This was taken from the chrome mirror on the driver's side. I compared
this dimension to several other A-body cars I own and notice this dimension
only appears correct for early 70 models. The dimension for 71-2 models
is another inch towards the rear....8.125". You can measure
from the leading edge on the driver's door and do the same for the passenger
door. The dimension shown can range from 7 to 7.125" for 70 models
and 8 to 8.125" for 71-2 models.
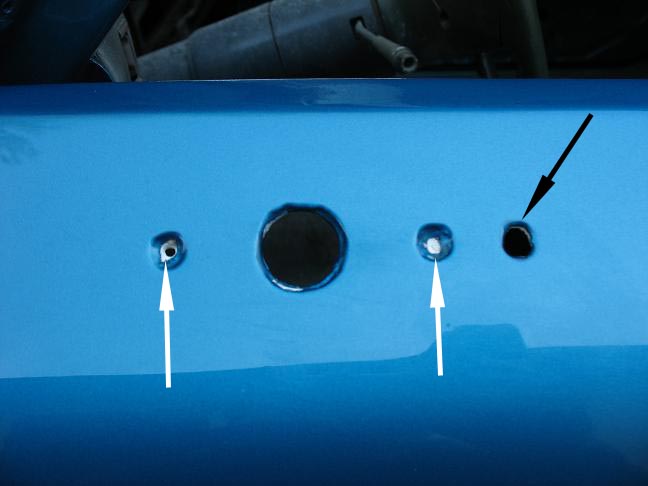 Here is the driver's door. The white arrows indicate the
mounting holes for the mirror bracket. The black arrow indicates the hole
for the mounting tab found on the chrome mirror base gasket. Sport mirrors
will not have that tab. Large hole is for remote control cables to slide
into the door and then connect to the back of the remote located on the
door panel. All holes were covered on this early 70 Skylark conv when the
sport mirror base gasket was installed.
Here is the driver's door. The white arrows indicate the
mounting holes for the mirror bracket. The black arrow indicates the hole
for the mounting tab found on the chrome mirror base gasket. Sport mirrors
will not have that tab. Large hole is for remote control cables to slide
into the door and then connect to the back of the remote located on the
door panel. All holes were covered on this early 70 Skylark conv when the
sport mirror base gasket was installed.
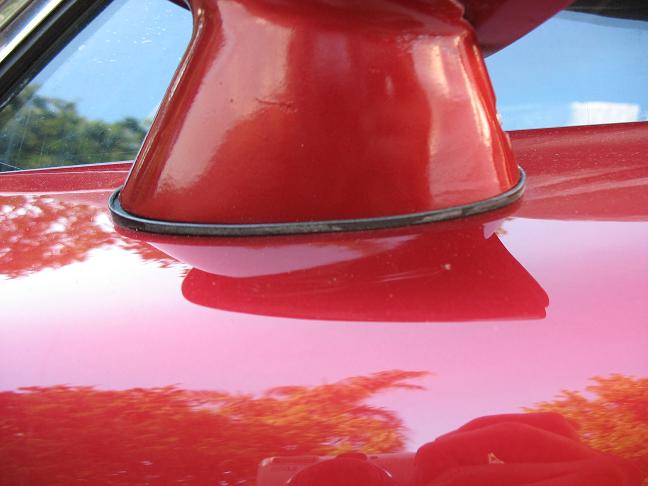 This shows the mirror gasket with the thin edge facing outside.
 This shows the thick edge facing the door glass. If you place
the thick edge on the other side the mirror head will be tilted inwards/towards
the door glass.
This shows the thick edge facing the door glass. If you place
the thick edge on the other side the mirror head will be tilted inwards/towards
the door glass.
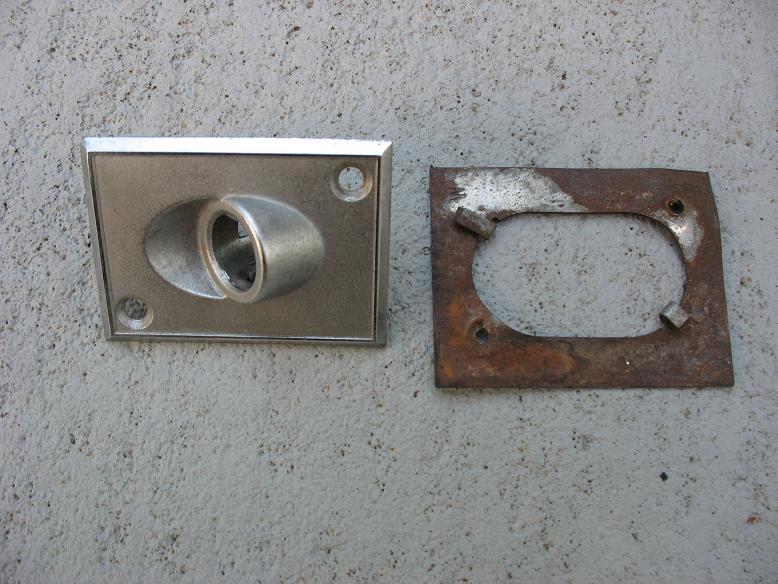 Here is the interior finishing trim piece and the retaining
plate. Make a hole the same size at the oval in the retaining plate in your
door panel. Carefully bend the tabs straight and insert the retaining plate
from the back of the door panel. Gently bend the tabs over the door panel
to hold the retaining plate to the door panel. When installed the tabs should
be facing the driver. Use a small scriber to punch/make two holes for the
screws to pass through the door panel backerboard.
Here is the interior finishing trim piece and the retaining
plate. Make a hole the same size at the oval in the retaining plate in your
door panel. Carefully bend the tabs straight and insert the retaining plate
from the back of the door panel. Gently bend the tabs over the door panel
to hold the retaining plate to the door panel. When installed the tabs should
be facing the driver. Use a small scriber to punch/make two holes for the
screws to pass through the door panel backerboard.
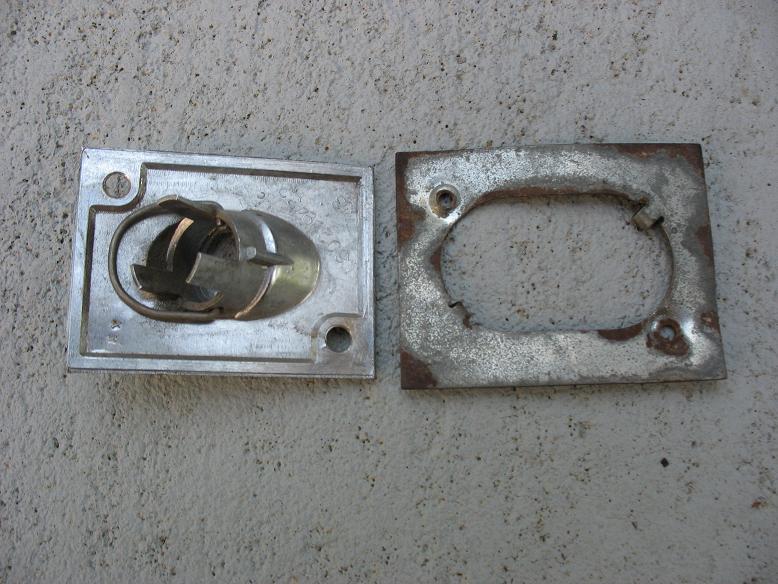 Here is the back of the finishing piece with the "U-clip".
Remove the clip and install the mirror controller through the finishing
plate and then install the clip. Next, mount the finishing piece to the
retaining plate using two Phillips head screws.
Here is the back of the finishing piece with the "U-clip".
Remove the clip and install the mirror controller through the finishing
plate and then install the clip. Next, mount the finishing piece to the
retaining plate using two Phillips head screws.
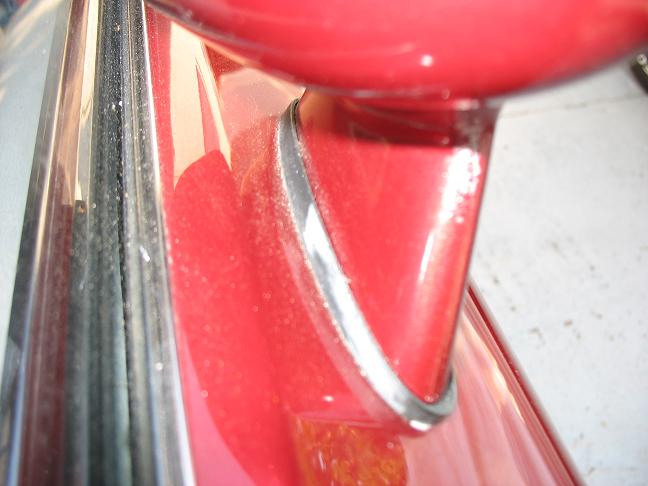
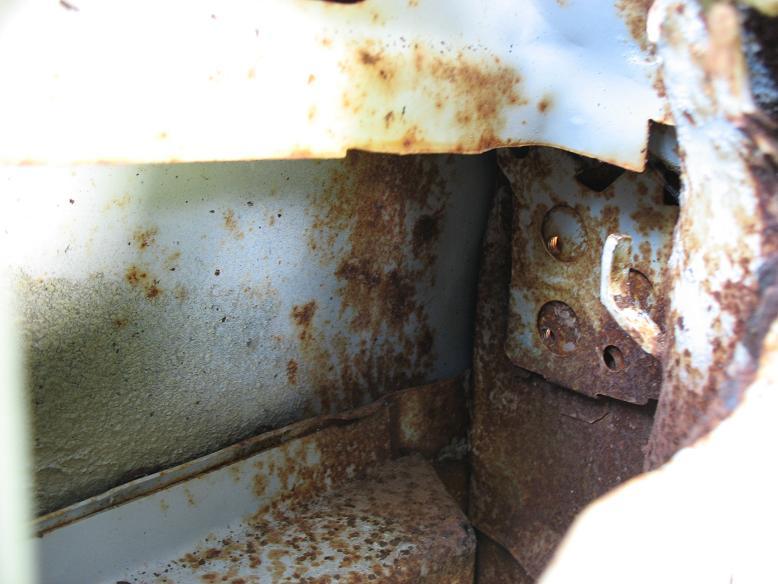 Here is the metal tab/guide to hold the mirror control cable
away from the window mechanism.
Here is the metal tab/guide to hold the mirror control cable
away from the window mechanism.
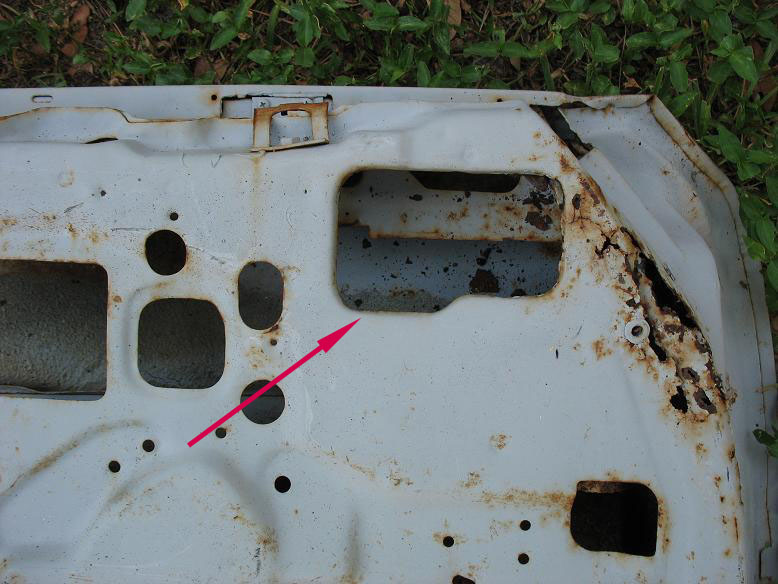 The red arrow indicates the opening where the interior controller
will be located.
The red arrow indicates the opening where the interior controller
will be located.
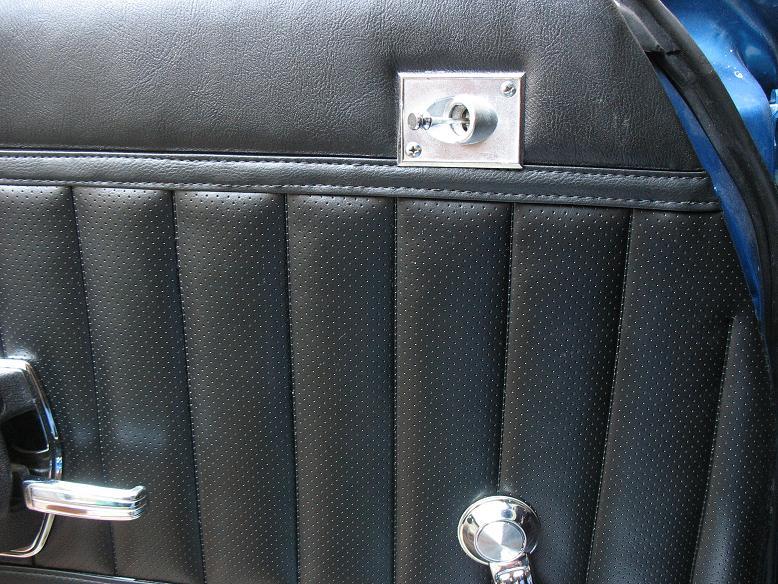 Here is the complete installation of the interior controller.
The center of the controller is located 19 1/2 inches from the bottom of
the door and 35 inches from the rear of the door.
Here is the complete installation of the interior controller.
The center of the controller is located 19 1/2 inches from the bottom of
the door and 35 inches from the rear of the door.
Note: If you are not a purist, you
can use the 70-81 Camaro/Firebird (F-body) sport mirrors on your 70-2 Skylark.
The passenger side mirrors on some 75 and all 76-81 mirrors will have the
words "OBJECTS IN MIRROR ARE CLOSER THAN THEY APPEAR" etched on
the surface. When using the F-body mirrors, you will have the thick side
gasket on the outer side. The F-body mirrors are much more common and much
cheaper than the original 70-2 Skylark mirrors.