How to Remove a Buick Glove Box Lock
by George Nenadovich
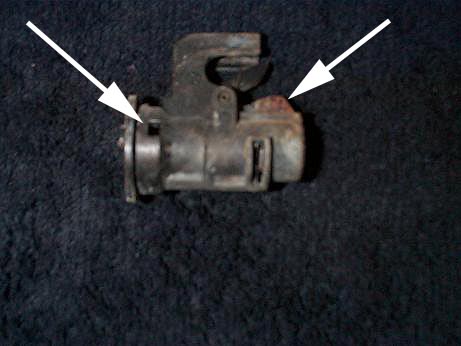 Here is the back side of the glove box lock. In order to
remove the glove box lock from the door, open the door and then close the
catch indicated by right arrow (shows the open position) to the closed position.
Use a small metal scriber or finishing nail or brad nail to depress the
lock cylinder tangs one at a time. Depress one with your right hand using
a scriber and gently pull on the lock cylinder with your left hand.
Here is the back side of the glove box lock. In order to
remove the glove box lock from the door, open the door and then close the
catch indicated by right arrow (shows the open position) to the closed position.
Use a small metal scriber or finishing nail or brad nail to depress the
lock cylinder tangs one at a time. Depress one with your right hand using
a scriber and gently pull on the lock cylinder with your left hand.
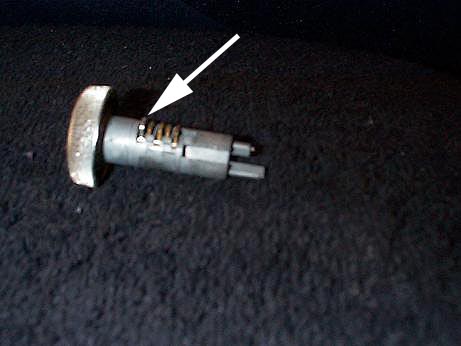 Arrow indicates lock cylinder tang. There are 5 of them.
You have to repeat the above
mentioned proces for each tang in order to get the cylinder
out.
Arrow indicates lock cylinder tang. There are 5 of them.
You have to repeat the above
mentioned proces for each tang in order to get the cylinder
out.
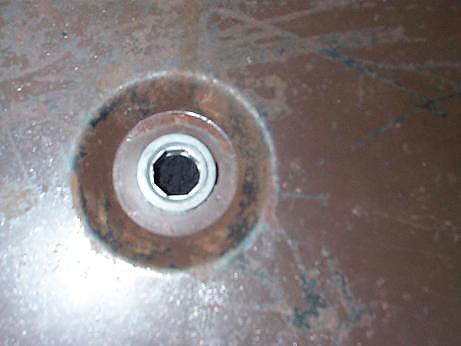 With the cylinder out, you will need to remove the latch
nut.
With the cylinder out, you will need to remove the latch
nut.
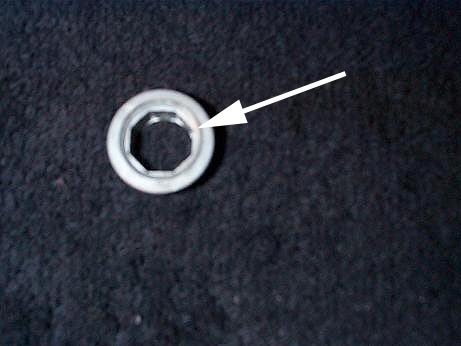 Here is a close-up of the nut. Notice it has 8 sides not
6.
Here is a close-up of the nut. Notice it has 8 sides not
6.
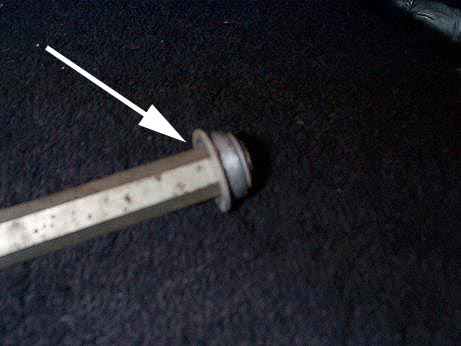 Sometimes you can use a 1/2" Allen wrench to remove
the nut. The wrench has 6 sides and barely fits in the nut. Do NOT use excessive
force to remove the nut. If you can rotate it easily. You need to stop and
get the tool below.
Sometimes you can use a 1/2" Allen wrench to remove
the nut. The wrench has 6 sides and barely fits in the nut. Do NOT use excessive
force to remove the nut. If you can rotate it easily. You need to stop and
get the tool below.
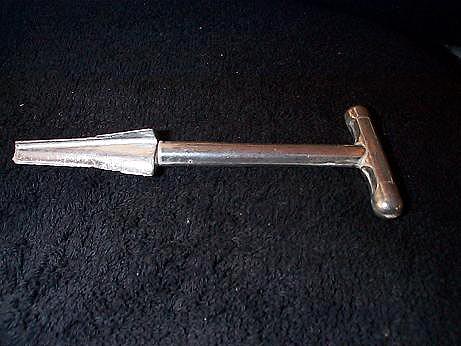 This is a "sprinkler/pvc" pipe tool available at
Home Depot. It has a tapered end similar to a reamer. This is made from
cast aluminum and will not damage the nut provided you do not use too much
force to remove the nut.
This is a "sprinkler/pvc" pipe tool available at
Home Depot. It has a tapered end similar to a reamer. This is made from
cast aluminum and will not damage the nut provided you do not use too much
force to remove the nut.
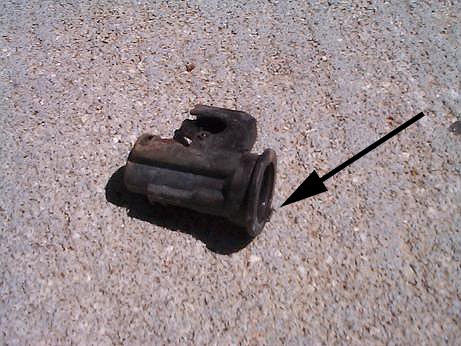 Here is the latch removed from the glove box door. Notice
the small tab indicated by the arrow. This locates the latch in the door.
Here is the latch removed from the glove box door. Notice
the small tab indicated by the arrow. This locates the latch in the door.
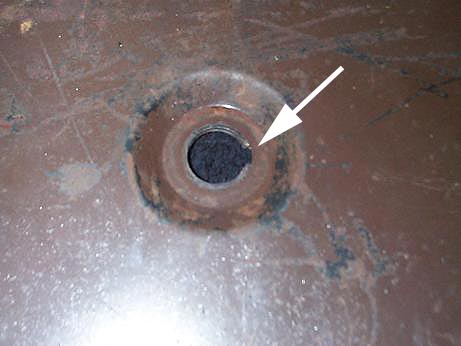 Here is the notch for the tab to slide into.
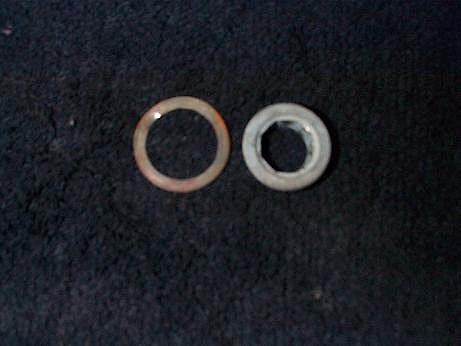 Most of the time the plastic washer on the left is missing.
It is not really needed
to reassemble the lock set-up.
To install the lock, reverse the process and gently tighten
the nut in the latch. Make sure the latch is in the closed position when
you slide the lock cylinder into the latch.
Most of the time the plastic washer on the left is missing.
It is not really needed
to reassemble the lock set-up.
To install the lock, reverse the process and gently tighten
the nut in the latch. Make sure the latch is in the closed position when
you slide the lock cylinder into the latch.